Table of Contents
Theme Installation
- Log in to your Ghost website admin (example.com/ghost).
- Click the settings icon ( ) at the bottom of the left-hand side.
- Go to Site > Theme and click Change theme.
- Click Upload theme and select the sinai.zip theme file.
- Once uploaded, click Activate.
Members / Subscriptions
Sinai has different interface elements for membership features.
- Log in and Subscribe buttons in the header
- Footer subscription form
- If the post is set to Members Only, a Call to Action section on the Post page to encourage visitors to subscribe
Disable Membership Components
To remove membership links, forms, and paid-content prompts from the theme, disable membership access in Ghost Admin.
- Go to Settings > Membership > Access > Subscription access.
- Select Nobody.
- Click Save.
Remove ‘Log In’ and ‘Subscribe’ from Header
Add the following CSS in the Ghost admin Code Injection Site Header.
<style>
  .c-header .is-membership { display: none; }
</style>
Click Save.
This will also remove the Account link when logged in.
Remove Ghost Portal / The Bottom Right Button
This is the Ghost Portal button. You can disable it in Ghost Admin. Learn more in Portal Look and feel.

Membership Troubleshooting Tips
If the subscribe form shows an error, check these items first:
Make sure your site is running the latest version of Ghost.
If you self-host Ghost, configure the mail settings and restart your server.
Make sure the Ghost config URL matches the public URL readers use to visit your site, as described in the Ghost docs.
Use the full public URL. If your site uses a subpath, enter the full path, such as https://example.com/blog/. If SSL is enabled, use https://.
If the issue continues on Ghost(Pro), contact Ghost support. If you self-host, contact your hosting provider.
Membership email delivery and server configuration are handled by Ghost or your host, not by the theme.
For more information about Members, connecting Stripe, and setting the package price, check the official Ghost documentation.
Color Scheme
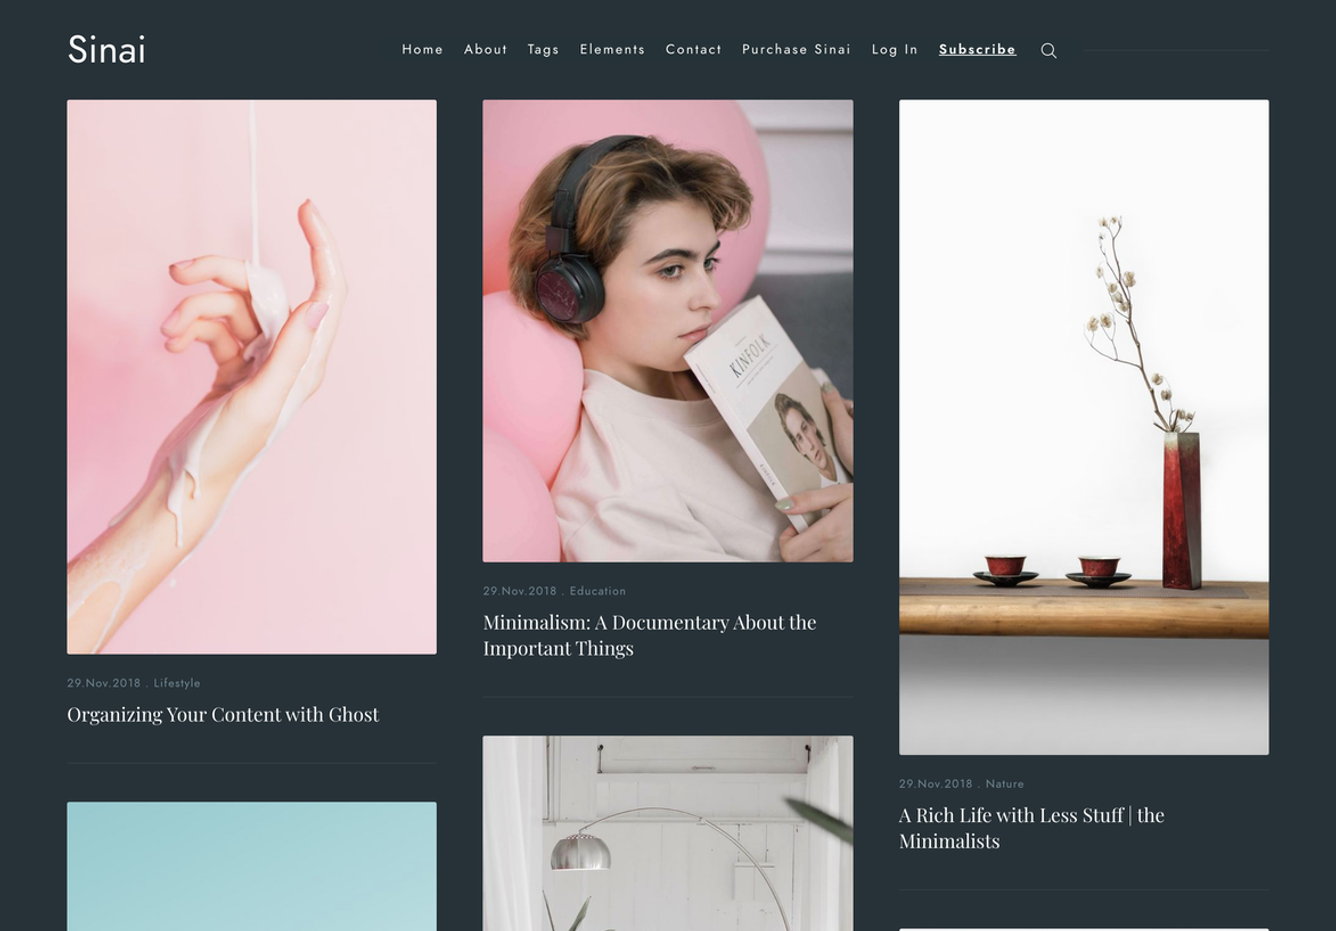
Sinai includes six color options: Default Colors, Custom Colors, Soft Plum, Dark Charcoal, Dark Moss, and Dark Claret.
To change the color scheme, open Settings > Design & branding in Ghost Admin and choose the Color scheme theme setting.
Each preset sets the main background and text colors. Custom Colors lets you set the site background and main text colors from Ghost Admin.
Sinai uses Ghost’s Accent color for content links. Change it from Settings > Design & branding > Brand > Accent color.
Typography
Sinai supports Ghost Custom Fonts.
To change fonts, open Settings > Design & branding in Ghost Admin and use the typography controls.
By default, Sinai uses Jost for body text, navigation, labels, and article titles. It uses Playfair Display for post card and teaser titles.
Navigation
You can add, edit, delete, and reorder the navigation menu in Ghost Admin from the Settings > Site > Navigation > Primary.
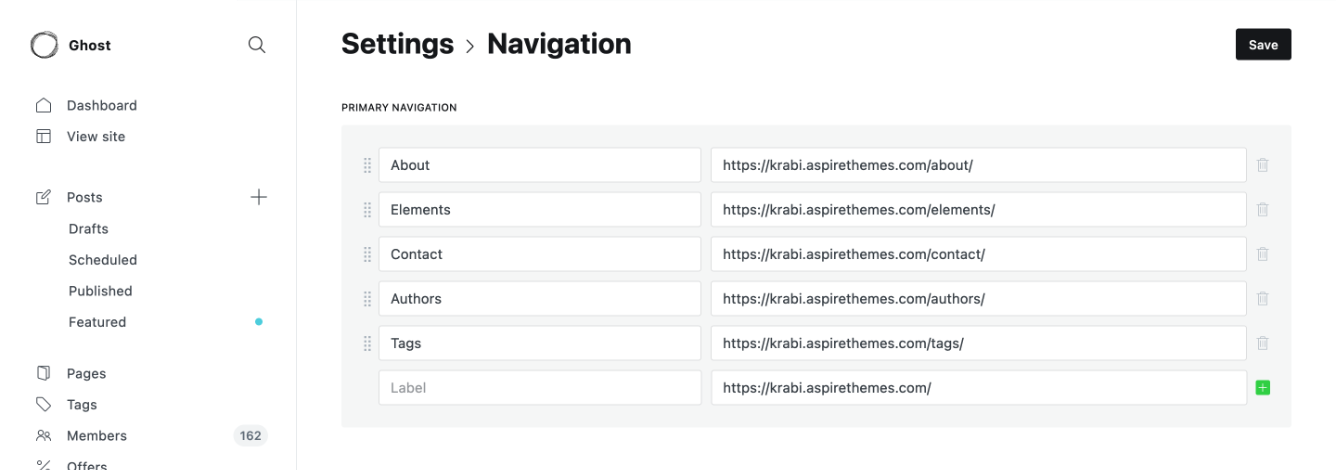
To include a static page on your navigation menu, follow these steps.
First, type the page’s name in the label field as you’d like it to appear on your menu.

Next, click on the item’s URL. The blog URL will already be auto-populated. Add the page slug after the final /. When satisfied with your page configurations, click the Save button.
Secondary Navigation / Footer
Like Header Navigation, you can add the footer navigation links from the Ghost admin Settings > Site > Navigation > Secondary.
Search
Sinai uses the Ghost Native Search.
Ghost search uses post titles and excerpts from the 10,000 most recent posts. It does not search the full body of every post.
To remove search:
- Go to your Ghost admin Settings > Design > Site design > Site-wide
- Toggle the Show search option off
- Click Save
Tags Page
The Tags page will automatically pull your website tags. Max 100 tags will be shown.
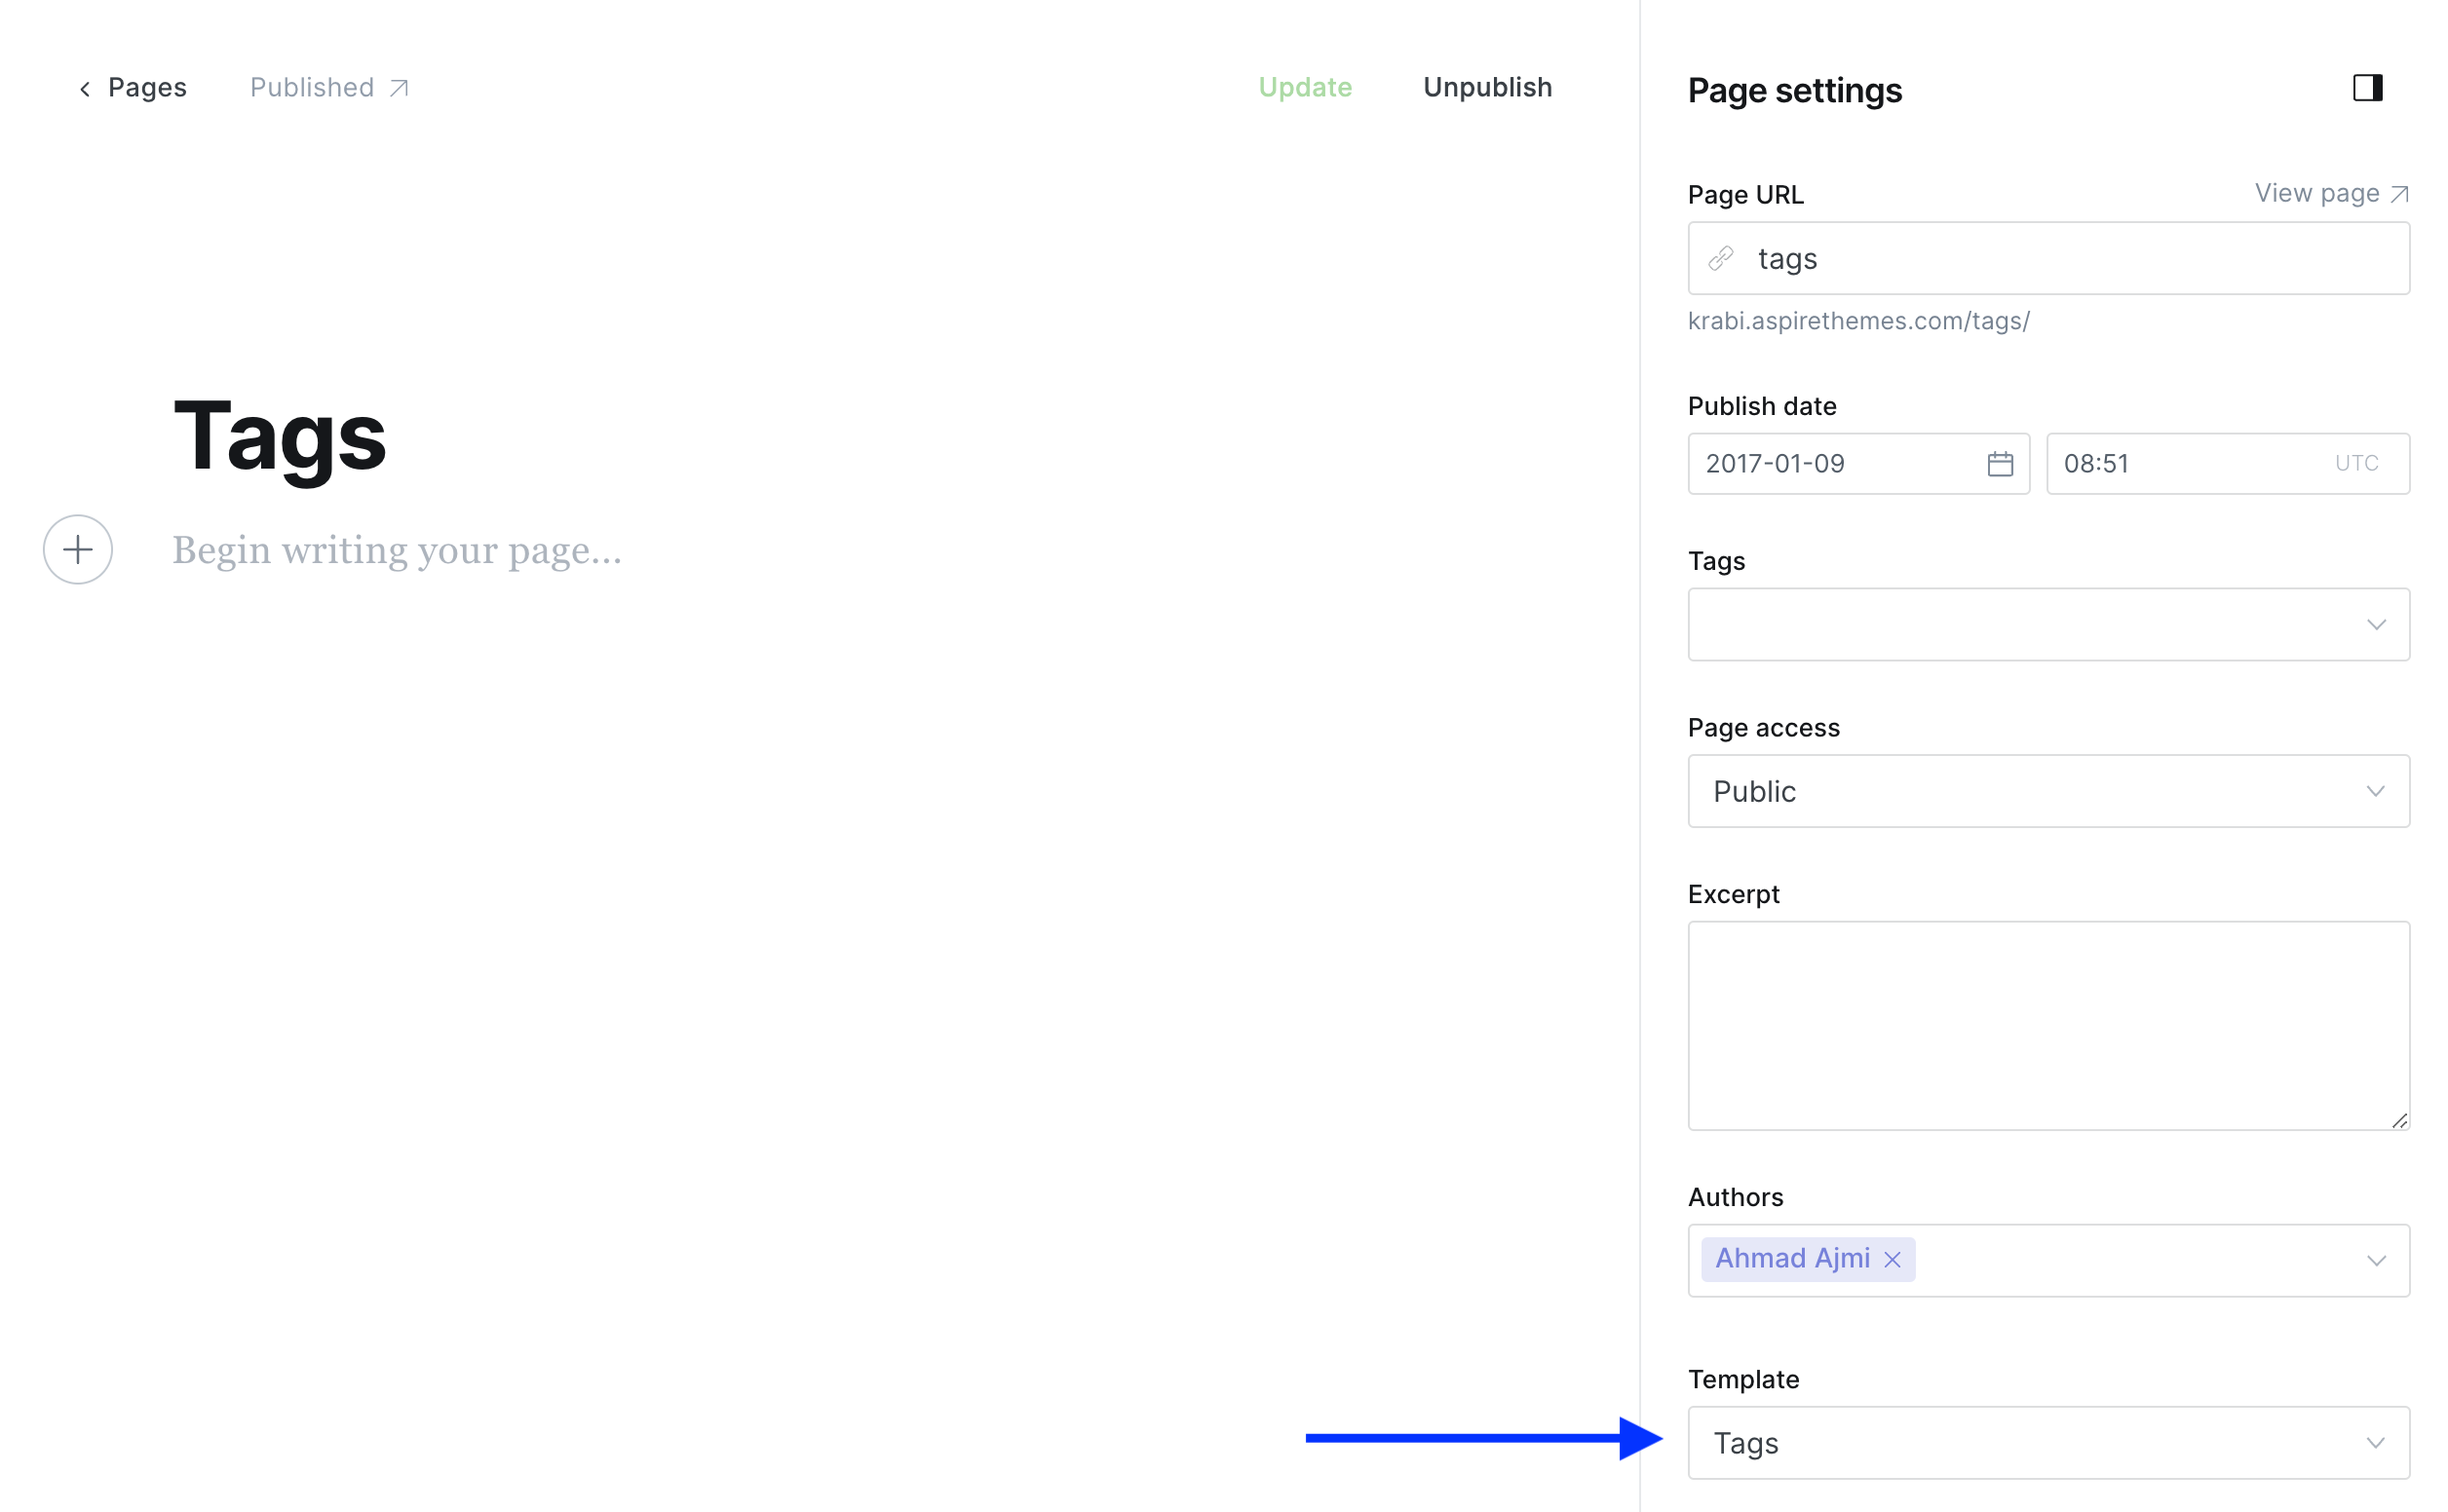
Follow these steps to create the Tags page:
- From the Ghost admin Pages section, create a new page and give it a title, like “Tags”.
- From Page settings, select the Tags template.
- Click Publish to publish the page.
- To add the page to the navigation, please check the Navigation section.
Note for Self-hosters
If you are self-hosting your website, you may need to do a server restart. This should get the Tags option to show up in the Template dropdown.
Contact Page
To create the Contact page:
- Create a new Page and give it a title, like “Contact”.
- Add your content and the contact form code using Formspree as a service. Please check the code example below.
- Click Publish to publish the page.
- To add the page to the navigation, please check the Navigation section.
<form action="https://formspree.io/your@email.com" method="POST">
  <input type="text" name="name" placeholder="Name">
  <input type="email" name="_replyto" placeholder="Email">
  <textarea name='message' placeholder="Message"></textarea>
  <input class='c-btn' type="submit" value="Send">
</form>
For more information, check out How to Add a Contact Form to Your Ghost Blog.
Comments
The theme comes with Ghost Native Comments integration. You can turn the comments on from your Ghost admin Settings > Membership > Commenting.
Learn more about Ghost comments.
Ghost developer documentation for comments.
Home Page Posts by Tag
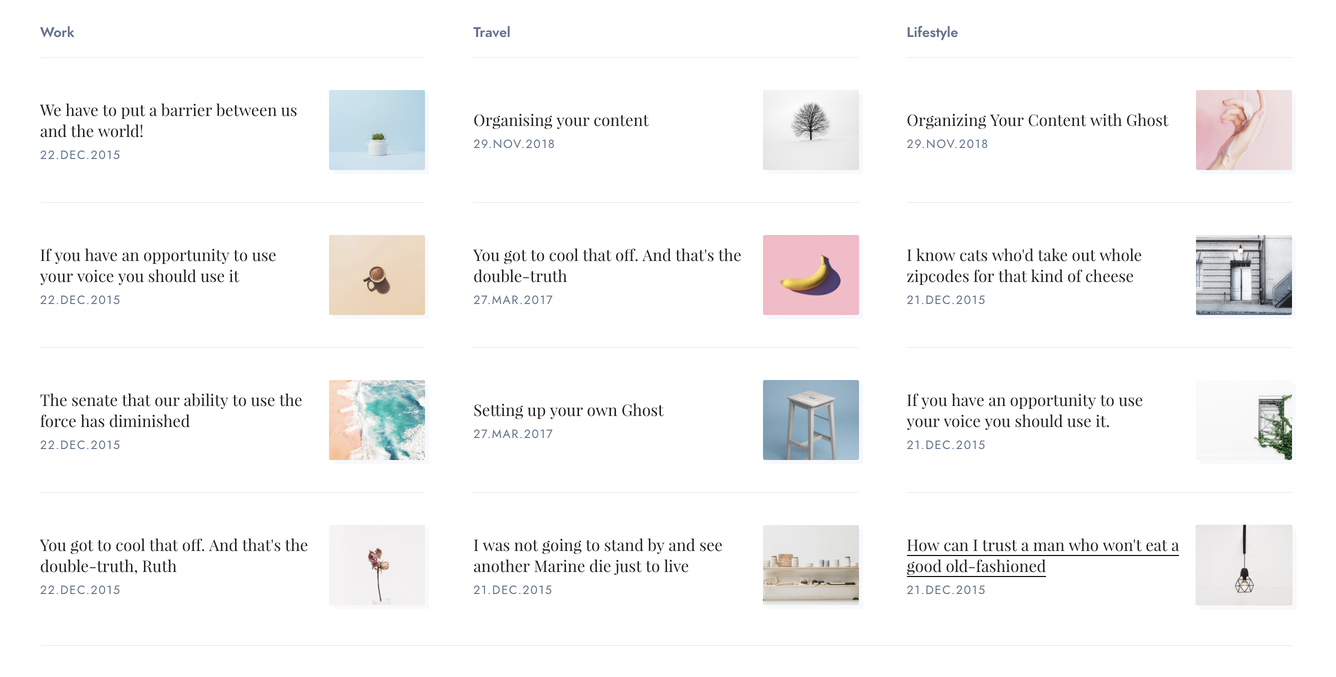
Sinai can show homepage sections for selected tags. Each section shows the four latest posts from that tag.
To choose the sections:
- Go to Settings > Design & branding > Homepage in Ghost Admin.
- Add the tag slugs to Tag slugs for home sections.
- Separate slugs with commas and no spaces.
Example:
design,photography,culture
Posts Per Page
You can control how many posts to display per page from the theme package.json file. Open that file using a code editor and change the posts_per_page value from 12 to a number.
"config": {
  "posts_per_page": 12
}
The theme default value is set to 12 posts per page.
Once you finish, zip the theme files, and upload the final zip file to your Ghost website.
Related Posts
Related posts section will be visible at the bottom of a post if other posts share the same tags as the current post.
Publication icon
You can change the favicon from the Ghost admin Settings > Design & branding > Brand > Publication icon.
Footer Social Media Icons
Sinai uses Ghost social accounts for footer links. Go to Settings > General > Social accounts in Ghost Admin and add the URLs you want to show.
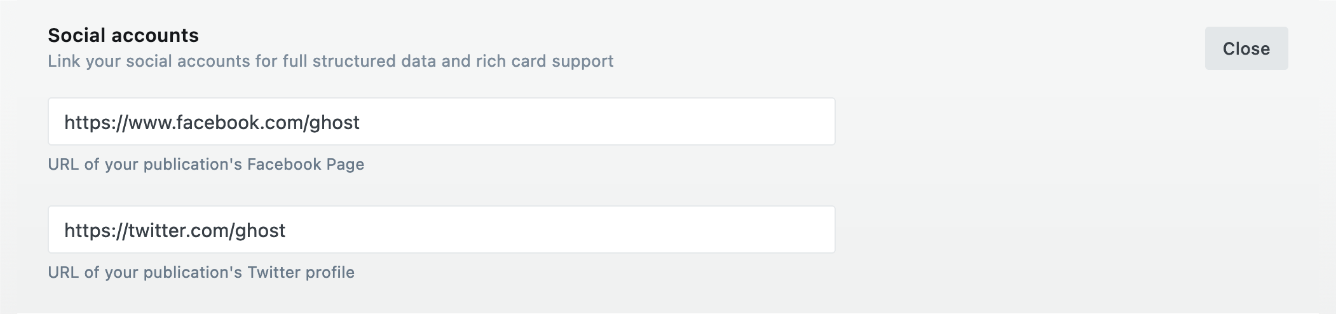
The footer includes icons for X, Facebook, LinkedIn, Bluesky, Threads, Mastodon, TikTok, YouTube, Instagram, and Pinterest when those accounts are available. Staff profile social links use each staff user’s profile fields and appear on author pages.
Languages
Sinai includes translation files for:
da, de, en, es, fi, fr, it, nl, pt, tr
Theme Translation
To use one of the included translations, open Settings > General > Publication language in Ghost Admin and enter the language code.
For example, enter fr to use French.
Zip Theme Files
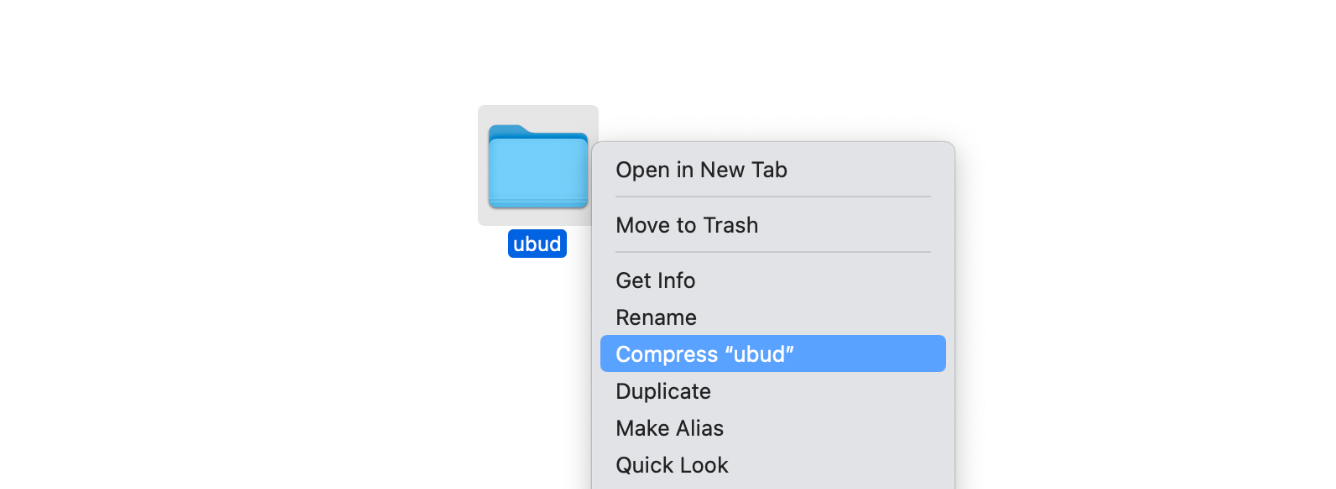
You can compress it as a standard folder like any other folder on your computer. If you are on Mac, right-click on the theme folder to view the context menu. Then, click the Compress option.
Have any questions? Contact Ahmad